Saturday, June 22, 2013
The Best Ways Of Cleaning Granite Tiles
Granite is a natural stone that oozes luxury and sophistication. Granite tiles spell class and richness. They have a unique beauty because of their special colours and sparkle. Though the stones are highly durable, following some simple tips can keep the shine long-lasting. Cleaning granite tiles is a simple process and accomplished by the use of dust mops or brooms. Granite is hard wearing and used in high traffic areas. In such areas, there is a large accumulation of dust. Use a soft broom to clear the dust and wipe with a soft mop. While using a wet mop, wring it well and wipe the surface. Avoid using any kind of chemical cleaners, which might dull the surfaces. Use only recommended cleaners in the right quantity to clean the surfaces.
Basic soap along with water might not be enough to get rid of the dirt completely. Excessive use of soap might dull the surfaces. Most flooring outlets sell cleaners meant specifically for use on granite tiles. Use this along with a soft brush for removing the dirt and grime. Do not use harsh and abrasive scourers while scrubbing the stains. If the floor is frequented by kids and pets, look out for spills and stains. Clean the spills immediately before they dry out. By following this, the overall appearance is improved.
After installation of granite, a good quality sealant is necessary. Sealant protects the surface of granite and extends its durability. You will find a good sealant in any of the local flooring stores. This is worth investing in, as it reduces the chance of seepage when any liquid spills on them. Granite is an investment by itself, and you should take all the steps necessary to maintain it well. Do not consider the sealant application as an extra expense, but consider it as an additional investment for improving the life of the flooring.
Granite tiles are well known for its sturdiness. This material is used extensively for kitchen countertops. Kitchens are breeding areas for germs and bacteria. Because of the low absorption qualities of this stone, it is ideal for kitchen usage. The surface of this stone does not allow bacteria to thrive. Take the help design magazines and internet to find the right colour and pattern for your kitchen walls and floors. A few cautious steps in cleaning can extend their life. Your effort spent in the up keep of these stones will reflect in their stunning beauty and shine.
From: ezinearticles.com
Introduction of Quartz Stone
Quartz stone are in a vacuum under the conditions of natural quartz crystal
mine manufactured large-sizes, is a new type of high-grade environment-friendly
decorative surfaces to replace natural and traditional man-made stone, are
widely used in various aspects of the decoration. Quartz-stone up to 93% of
natural quartz crystals as the main raw material, quartz crystal itself is
crystal clear, bright, beautiful colors, luxurious, high hardness,
non-deformation, non-discoloration, toughness and strong, non-radioactive, acid
and other natural features. Would you be interested in itsion flow, well, here
we go!
1, Quartz Stone raw materials selection
The engineers looking for high-quality quartz minerals and other additives,
in the procurement at the same time, spare no effort to assists to enhance the
quality and craftsmanship, strict demands on the quality, and continue to study
a variety of new quartz mineral, to ensure compatibility with the annual quartz
stone the development of new designs.
2, purification and mixing of quartz-stone raw materials
Particle size of a variety of quartz mineral by the purification device to
remove impurities and pure, then deliver it into a giant mixing tower, step by
step to the mineral and other additives evenly mixed. Does not contain
impurities in the quartz stone material and uniform mixing, quartzs are the
fundamental guarantee for defect-free.
3, Quartz stone will be thick molding
Ratio of materials and mixed well into the large-scale molding machine, the
computer induction from fixed equipment on thick quartz embryo formation
materials and precise adjust thickness, molding placed directly on belt
conveyors, each only forming a sheet.
4, vacuum die casting
Quartz stone forming embryo material at die-casting machine with precisely
controlled by a computer throughout the process, equipment will be the air gap
of mineral row to close to vacuum, the formation of ore, slag, and other
additives accumulation among the most closely by the experienced quality track
and monitor the entire process control engineer. Each specification will be very
large quartz slab for the vacuum die-casting material used to protect the dense
and non-porous, plate-size the greater the process more complex.
5, Quartz stone surface polishing
At automated roller conveyor line quartz stone slab was slow-moving,
through 30 group from the coarse-to-fine polishing head. Under high-speed
rotation, combined with cooling water and many different abrasive, quartz stone
surface has been polished into a special deal with shiny mirror effect. Nande
quartz stone texture depth and texture the surface treatment which fully
demonstrated.
6, Total Quality Detect
Polishing the surface of each piece to complete the deal with quartz slab,
through the transmission lines will be entering the final quality control
inspection of the surface brightness, pores or other types of defects for the
whole of each inspection. Comprehensive quality inspection to eliminate defects
in the quartz stone has left the Factory.
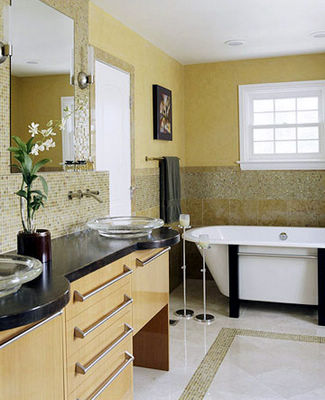
Tile Size Tips for Small Bathrooms
Bathroom tile is available in a wide variety of colors, materials and sizes
that can add updated style to your interior design. Your options include
ceramic, porcelain, glass, stone and slate in warm, earthy tones, vibrant jewel
tones, light pastels or classic neutral colors. Well, if you are still in the
trouble of bathroom tile size, you could take the following tips into
account.
Firstly, small tile without contrasting grout lines. Select small
1-by-1-inch tile for your small bathroom as long as you reduce the appearance of
contrasting grout lines. Contrasting grout lines enhance the pattern in the tile
and make it look like a checkerboard. A heavy pattern does not complement a
small bathroom and often makes the room appear even smaller. Opt for
light-colored small tile with matching grout if you want a room-expanding
design. The Yorkshire Tile Company recommends that you consider the spacing
between your sink, bathroom, windows, doorway and shower before you select a
tile size. If the spacing between fixtures is compact, small tiles may be the
better option because they flow better than larger tiles.
Secondly, for medium-sized tile, install medium-sized tile in a small
bathroom if you want to encourage uniformity and simple design elements.
Medium-sized tile measures approximately 4 inches by 4 inches and is installed
with thin grout lines between each tile. The World Floor Covering Association
reports that installation of small tiles requires more grout joints that can
make a small bathroom floor appear too busy. Large bathroom tiles can make a
small shower area and a bathroom floor appear disconnected. According to the
site, "Scale plays an important role in giving a space an overall
balance."
Then, for the large uncut tile, choose large 12-by-12-inch tiles if your
bathtub and floor areas can accommodate uncut tiles that size. According to The
Yorkshire Tile Company, a company with over 35 years of tile industry
experience, if the majority of large tiles can be installed without having to
cut them into smaller pieces to make them fit in your bathroom, the end result
can be very impressive. Select large tile if your faucet, shower head and floor
dimensions do not require you to cut the large tiles into smaller square,
rectangular or triangular shapes to fit the space.
Tuesday, June 11, 2013
Recommendations for Quartz Tile Installation
Tile installation for quartzs can be a nightmare if you don't read
the necessary recommendations. Why? Because quartzs have very low porosity, if
you don't use the correct adhesive, one thing that can happen to your beautiful
quartz tiles is several tiles popping up from the floor or wall. Engineered
quartz tiles are made of 90-95% natural quartz and bonded together with
polyester resin. As we all know, polyester contracts and dilates more than
natural stone
itself, therefore the whole tile installation for this type of material should
have this in mind.
What most producers recommend, for tile installation is as follows:
1. Clean the surface: where the tiles are going to be installed, make sure the area is free of cracks, stable, clean (without dust and other debris), smooth, guarantee the perfect setting for the tiles
2. Preparing the Adhesive: make sure it's the proper adhesive, basically it should be a two component adhesive without water, or better uses latex liquid. The mix should follow this sequence: first the liquid latex component and second the powder component, don't switch this order.
3. Spread an even flat layer of the adhesive on the tiling area, not thicker than 5 mm
4. With the notched side of the trowel, comb the flat even layer of adhesive to help the tiles fit in perfectly and securely
5. To get better results, you should also spread some adhesive on the back of the tile before laying it in place. Make sure you time these operations correctly, make sure the adhesive is not too dry ...
6. Use rubber mallet to help adjust the tile when fitting it into place
7. Use flexible cement based grout for the joint area
Saturday, June 8, 2013
Stone Tile Application Ideas for Bathroom
Bathroom tile is both functional and aesthetic. Tile in inherently
antibacterial, wet areas like the bathroom works best with or natural stone on the floor.
Well, today we would like to share some tile application ideas for
reference.

Marble is one of the popular materials in the ornament of home, thus, we would like to introduce it first. Wrapped in the beauty of white Carrara marble , the room boasts a sophisticated, traditional style. The subway-style tiles provide a timeless backdrop for the curvaceous tub and freestanding cabinet.
Another quite hot application of marble tile is for shower. The natural, soothing appeal of this bathroom comes from the blue-green tumbled-marble tiles in the shower stall.
Then, don’t miss out the stone mosaic tile. Wide bands of tile on the walls and floor provide textural interest in this sunny bath. Large beige-marble floor tiles balance the vibrant colors of the walls and cabinetry. Mixing colors and styles of tile creates a high-end look.
Cleaning Tips for Sandstone Fireplace
A sandstone fireplace adds beauty and style to
any home. Sandstone is one of the most popular choices for indoor
natural stone
installations. It is lightweight, which contributes towards ease of
installation. The neutral look of the fireplace enables it to blend with
whatever style of furniture you have. When well cared for, sandstone
installations can reflect their natural beauty for several years. Below are
cleaning tips for your sandstone fireplace.
One is Day-to-Day Cleaning:
It is a good idea to clean your fireplace daily during your normal household chores. This helps to maintain its attractive appearance. A dry mop can help you clear away the usual dust and dirt. It helps if you brush the sandstone occasionally to freshen its appearance.
Another one is Thorough Cleaning:
Once a week, you may want to undertake a deeper clean. This helps to clear smudges and grime. A clean fireplace also contributes to higher performance and safety. Use a natural cleanser with water to clear dirt and grime from your fireplace. A soft bristled brush can help you clear the dirt effectively. Rinse carefully so that no traces of soap remain behind.
Soap residues give sandstone a dull appearance. Avoid acidic, alkaline or ammonia-based cleansers as these are likely to compromise the integrity of your sandstone. It isn’t a good idea to use ordinary household detergents on your sandstone. It leaves a residue which dulls the fireplace and encourages mildew to develop.
Friday, June 7, 2013
Create an Oriental Garden by Stone
Creating an Oriental stone garden is ideal for any space. Even a stretch of
land along an alleyway can be transformed into a small courtyard garden
showcasing Asian design principles. Naturally, a large space will allow you to
incorporate various stone and rock features for great effects. Eastern gardens
are supposed to be tranquil, natural, and simple. Stone provides the backbone of
the entire design. Think of as reflective of mountains in the landscape.
Usually, stone will be used in natural, uncut forms in these landscapes. For
example, where a Western garden might feature a neat terrace garden on a slope,
an Eastern garden will place large rocks haphazardly throughout the slope to
reflect a more naturally occurring situation.
Japanese gardens regularly feature groupings of natural stones of various
sizes. This might be a focal point, but it also works as a great border between
sections of the landscape. In a traditional Oriental garden, group uneven
numbers of rocks together with uneven spacing between them to mimic a natural
look. No straight lines in your Oriental garden. Traditionally, rocks should be
placed in the same positions in which they were found in nature. Mix sizes,
colors, and types of rocks to form beautiful groupings. Of course, Oriental
gardens feature traditional borders like rock walls to great effect. Chinese
gardens in particular make use of many walls to section off garden areas; in
this way, each section is a separate outdoor room. Oriental rock walls often
resemble rock piles and are seldom given a "finished" look the way rammed earth
walls have in Western gardens.
There are some tips with you: Rachel advises, "Cut rocks are sold
especially for the purpose of being mortar-less. These stackable rocks make
stable walls even without the use of mortar to glue them together. You can buy
these rock kits at garden supply stores or order them online."
Eastern gardens generally feature small rock elements as well. A rock with
a dip to collect water becomes a simple basin for a traditional Japanese tea
garden. A miniature rock wall acts as a support for a small cascade in a
Japanese courtyard garden. If the garden happens to be in a dry climate where
water is not easily kept, pools or streams of gravel can be installed to reflect
the element of water even though it is not present. Stones like white quartz can
be sprinkled atop the dry streams to represent foam and moving water. Sand or
gravel can be layered on top of the ground and raked into different patterns to
represent wind and water. Stone can also be used to form Oriental bridges over
true water features like creeks or ponds. Or, consider adding a few large rocks
to your pond to just above the water's surface like islands for a quintessential
Oriental look.
How to clean Tumbled Travertine Tile
Tumbled travertine tile is a hard, but is subject to scratching and
staining just like limestone, slate or no tumbleds. It isn't as hard as granite
, but is more cost effective to install. Cleaning it is not difficult, if you
take a few precautions.
Before Cleaning the Tile
Be sure you have brushed away all crumbs if it's a countertop or swept a
tumbled travertine floor with a soft broom. It is not recommended to use a
vacuum cleaner on tumbled travertine as it can scratch and damage the
tile.
Using Commercial Cleaners
Dealers that sell tumbled travertine tile usually also sell tile cleaners
that are totally safe for repeated usage. Check with your local dealer for this
product . Follow the manufacturers instructions.
Simple Cleaning Process
Wet a sponge with warm water and put a drop of detergent on it to create a
foam. Wash the entire counter thoroughly then rinse well with clean water. You
can allow it to air dry or dry with a soft cloth or towel.
Cautions about Cleaning Tile
Never use any that contains an acid such as vinegar or lemon juice. This
will pit the tile and dull the surface. Never use steel wool or scouring
cleansers. Mop up all spills immediately, especially coffee, juice or wine. Use
coasters to prevent rings.
Rough sandstone exterior, flamed sandstone interior
The exterior of the Blacksod Bay-complex is as rugged as its surroundings
on the north-west coast of Ireland. Mayo County is constantly exposed to a stiff
North-Atlantic breeze often accompanied by stormy weather.
Buildings in the region – and Blacksod Bay is no exception – cringe around
an inner court not unlike the wagon forts of the Wild West creating a protected
area in the inner court.
The hand-crafted outer stone walls are 18 cm-thick consisting of
rough-surfaced stone chunks. Masonry work took some 3 months for Vincent
Naughton Builders to complete.
Local Lacken Sandstone from a 30 km-distant quarry was implemented. The
stone is as hard as granite and comes in a variety of warm tones.
The insulation layer is 32 cm-thick making the walls a massive 73 cm in
strength. The roofing is slate tiles as is common for Irish architecture.
But those choosing to make the coast their home, are friends of rugged
nature and the elements.
Thus the complex is conceived to allow constant reference to the views of
the open sea, islands, and beach.
The purist choice of colors on the interior assures that there is no
distraction. „We wanted to keep the interior quiet, this was to maximize the
views of the surrounding landscape” as communicated by Stephen Haines of Tierney
Haines Architects.
But there is also an optical bond between the exterior and the interior
through the material. The sandstone can be found on the inner walls as well – in
flamed surfaces. The window sills and plinths give visitors a taste of what
awaits them inside.
The buildings meet the highest energy efficiency standards Building Energy
Rating A by using geothermal heating, heat recovery ventilation and south
alignment on top of the massive insulation of outer walls.
A bit of historic trivia: The Irish County of Mayo survived a dire period
of famine from 1845 to 1849 which cost thousands of lives. Many Irish sought
their fortune in America and emigrated during these years. The cause of the
famine was not only an aggressive potato fungus but also ruthless exploitation
of farmers by landlords.
From 1879 Mayo became the center of the Land League and fought for a land
reform and against high leasehold tariffs. It was the birthplace of the word
„boycott”: Charles Cunningham Boycott was a landlord ousted by passive
protests.
Steps to Clean Onyx Countertops
When they asked why choose Onyxs, most people would mention their beauty with
various warm color hues running through them. Yeah, it is perfect as ornament
especially when there is a suitable lighting to highlight it. While since it is
made of calcite, it is prone to etching by various acids that are commonly
encountered ins such as those from strong cleaners and tomatoes. You would
therefore need to clean it more than harder materials, more cleaning steps, just
take the following into account.
Step 1 – Preventing Acid Etching
To prevent various acids from etching your onyx countertop, seal it with a sealant that is food safe. Apply it according to what is specified on the package and do another application when water does not form beads on the surface anymore.
Step 2 – Cleaning the Countertop
Use a mild cleanser and soft cloth when cleaning your onyx countertop . Find something that has “green” printed on the label since suchs are generally safer for onyx. Check to see if it is stone safe as well since many cleansers have too much acid for onyx.
Step 3 – Blotting Spills
For spills that happen on the onyx countertop , blot them off immediately. Never wipe them since the potential damage of the spill can widen. Leaving a spill for longer periods will likewise cause damage to onyx especially if it is acidic.
Three common types of Marble Flooring
Marble stone is always on behalf of elegance for the decoration of house,
which also adds the value to homeowners. It is well known that marble is a
strong material used for building, for that it is made from natural. Even though
it looks similar to quartz or granite , this one is more widely used not only
for its durability, but also for the wide array of colors and finishes that it
provides. Read on to learn about the 3 most common types of flooring.
Polished Marble
The most common type of flooring is the polished marble. It has a shiny and
smooth surface that gives off a mirrored effect similar to that of a polished
wooden floor. Its beauty is its main benefit, but this type of flooring can be
expensive and will require high maintenance. It is also more slippery than other
types.
Honed
With honed marble, the marble tile is not deeply polished and thus not as
appealing as polished marble. The matte finish is more advantageous for use in
areas with high walking traffic as it is less susceptible to wear and tear.
Since the finish is matte, it is also not as slippery.
Tumbled Marble
Marble that is tumbled with sand and aggregate has a smooth and authentic
look. It recalls ancient marble statues that you would find in ruins and
museums. This type has a soft and rounded texture that is also resistant to
skids. The disadvantage is that it is porous and highly prone to wear and
tear.
Best Method to Clean the Surface of Stone Tile
What’s your first impression of dingy grout or tile ? Yeah, it will detract
from the overall look of an otherwise great space. Keeping clean and grout can
make the difference between freshening up a space and having to endure a
complete renovation. The best way to clean tile surfaces is to use a soft cloth
and warm water when dealing with mild soil. While more stringent stone cleaners
or scrubbing implements may sometimes be necessary to clean tile, it is best to
start out using the mildest options possible to protect the glaze.
If your surface isn’t glazed, consider applying a sealant to protect it and to make it easier to clean tile. If you did not install the tile or have it installed yourself, you may be unsure about whether it is glazed. Apply some water to test it. If the color changes to a much darker tone, that means it is a porous surface that will absorb water, and it requires a sealant.
Some people suggest vinegar to clean tile on a regular basis. While it may remove some residue and appears to be a good choice, vinegar may damage tile surfaces and may also change the color of grout. Other mild household solvents and cleanings can be used to clean stone tile, but it is important to follow the manufacturer’s recommendations. Only uses clearly labeled as safe for tile surfaces.
If scouring is required to clean tile efficiently, look for a non-abrasive cleanser and use a nylon scrubber rather than steel wool or other coarse scrubbers. For grout, try a brush that has soft bristles, such as a soft child’s toothbrush. In addition, whenever you clean tile, it is very important to rinse away all cleaning products and residue thoroughly. Dry the area and then polish the surface. You can use a buffer if desired.
Introduction of Italian Marble
Italian Marble is the marble which originates in Italy. It
is very popular all over the world. The main colors of Italian are beige, cream,
White and pink. The Italian Marble is very famous due to the color and texture
of the material. Italian Marble Flooring makes the floor very beautiful and also
gives the floor strength.
Following are famous Italian Marble:
Botticino Marble
Diana Marble
Statuario (satvario)
Serpeggiante Marble
Red Verona Marble
Italian Travertine
Perlato Sicilia Marble
Following are famous Italian Marble:
Botticino Marble
Diana Marble
Statuario (satvario)
Serpeggiante Marble
Red Verona Marble
Italian Travertine
Perlato Sicilia Marble
Tips for Marble Polishing
Before the beautiful marble product , it needs a series process, and marble
polishing is part of the process of cleaning and caring for. Whether it’s your
kitchen counter or your living room floor, marble can be used in any places in a
household. In hotels, restaurants and offices, marble floors are also polished
until they gleam.
Marble polishing is needed to maintain this costly material. Despite the popular misconception, marble is not a hard substance. You should be careful in handling it so that you can preserve its quality.
A damp rag will help in cleaning marble on a regular basis. After that, you can buff the marble dry. Sometimes, stains will develop on marble but you need to choose the right cleaner for getting these out.
There are a number of solutions available on the market for marble polishing so choose carefully. You can also get marble polishing pads to complement the solutions that you purchase. You want to steer away from powder based cleansers because some of these may cause more damage and harm to the marble than you think.
A stone sealer can also be used on marble for added protection. Aside from this, if you are placing furniture on marble, it is advisable to place a rug or carpet underneath. Other than protecting the marble from scratches that furniture could cause, carpets could also absorb any spills from falling directly on the marble.
If you notice deeper scratches and indentations in the marble, it is better to consult with a professional on trying to get these out. In this way, you can remedy the situation before things get worse.
Remember that all marble has a natural polish. Every time you clean marble, your intention is to restore this natural shine, not go against it. You want to be gentle when cleaning marble. Do not use any abrasive cleaning materials or solutions.
Tips for Installation of Kitchen Counter
The secret to a good countertop installation is preparation — and
installing a involves a lot more than considering which materials to use.
Counter installation is one of the last things to happen in your kitchen or bath
renovation. Before your installer shows up to template, all cabinets must be
permanently installed — nothing can move between template and install.
Below you'll find information you'll need to be prepared with on template
day and helpful tips for after the counters are installed.
One is the height of countertop , different people and tasks require
different counter heights. If custom cabinets are not in your budget, one way to
vary the finished height of the counter is to use materials of different
thicknesses set on standard cabinets. A standard counter is 36 inches off the
floor, but if you have someone tall in your family, 39 inches may be a more
comfortable height. Here, a butcher block set lower than adjacent tops gives the
person chopping more leverage.
Another one is the support of it. In most spots, your cabinetry will
provide the support for thes, but think about what will support the counter
around the appliances. A slide-in range like the one pictured has a 2-inch strip
of counter behind the cooking surface. Because it is tricky to move two larges
connected by a 2-inch strip, this spot will often be seamed together onsite.
Make sure you install wood blocking flush with the top of the adjacent cabinets
so the contractor can properly attach this strip.
Another common trouble spot is where a counter ends on a dishwasher. The
dishwasher can't support the counter, so provide structural support on the side
— ideally more than a ?-inch fill panel.
Types and Grades of Travertine
Before purchasing your travertine tile, it is important to become familiar
with industry terms in order to choose the type and grade of tile most
appropriate for your purposes. While there is no industry standard name for the
grades of travertine, most establishments use the names listed below. The two
types of travertine tiles are created by using different cutting methods, not by
using different types of travertine stone.
Travertine Grades
There are three grades of travertine: premium, standard, and commercial. Premium grade, which is sometimes called first grade, is a tile that has been perfectly cut and has a uniform thickness throughout with very little filler. Standard grade, also called second grade, will also be perfectly cut with a uniform thickness, however, there will be a bit more filler in the stone. Commercial grade, also known as third grade, may not be perfectly cut on all sides and it will not have a uniform thickness. Additionally, there will be a great deal more filler within the stone.
The travertine tiles are carefully chosen to be consistent in color.
The tiles are double filled, first, by machinery and then by hand if any holes remain.
None of the travertine tiles of this grade will have large holes that were filled.
The edges of the tiles are smooth and evenly sized with uniform beveled edges.
Standard or Second Grade
This grade offers the second largest selection of travertine tile colors free from gray or black discoloration.
The travertine tiles are carefully chosen to have a consistent color throughout the lot.
Tiles are double filled as in the premium grade.
Some large holes are allowed in standard grade travertine tiles. Additionally, some holes may be filled through the full thickness of the tile.
The color may contain some striations or swirls.
The edges of the tiles are smooth and evenly sized with uniform beveled edges.
Commercial or Third Grade
Large color variations are allowed within the tile including gray or black markings.
Small unfilled holes are allowed as are small defects in sizing and honing.
The tiles are not hand filled.
It is acceptable for large voids to be filled.
Small holes that run from the surface to the bottom of the tile are allowed.
Edges may be cracked or broken.
Tiles may be delivered without color selection or sorting.
Travertine Types
Cut Types
Due to the bedding planes inherent in most travertine, it is possible to achieve a dramatically different look depending on the cut type chosen. The two cut types used to create travertine tiles are the Vein Cut and the Fleuri Cut. The travertine itself is the same for both types of tile; it is only the type of cut that causes the stone to differ in appearance.
Vein Cut
Vein cut describes the cutting process by which a cut is made against the bedding planes, or along the vein. This exposes the edge of the formation and gives the travertine tile a linear pattern.
Fleuri Cut
Fleuri cut, which is also known as a cross cut, is a cut made parallel to the bedding plane. This exposes a random pattern that is often circular. This cut does result in a strong tile; however, it is not ideal for high-traffic areas due to holes that may appear with heavy use. After installation, if holes should appear, it is standard practice to fill those holes instead of replacing the tile.
What criteria indicates good quality travertine tile?
All four corners of the tile should be cut at 90 degrees.
The color of the stone should not be marred my rust colored markings on either side.
There should be no pores in the filling of the stone.
The filling should consist of a hard resin that will not chip; cement is unacceptable.
The side cuts should be perfectly perpendicular; a slope is unacceptable.
The color of the tile should be consistent throughout the lot with limited color variations.
The thickness of the tile should be measured in inches and should be 18” x 18”.
The shipping crates should be strong wooden pallets suitable for forklifts.
The face of the tile should be visible from both sides of the shipping crates.
Styrofoam should be used on the bottom and sides of the tiles for protection.
Travertine Grades
There are three grades of travertine: premium, standard, and commercial. Premium grade, which is sometimes called first grade, is a tile that has been perfectly cut and has a uniform thickness throughout with very little filler. Standard grade, also called second grade, will also be perfectly cut with a uniform thickness, however, there will be a bit more filler in the stone. Commercial grade, also known as third grade, may not be perfectly cut on all sides and it will not have a uniform thickness. Additionally, there will be a great deal more filler within the stone.
Premium or First Grade
This grade offers the greatest selection of colors free from black or gray
discoloration in the travertine tiles.The travertine tiles are carefully chosen to be consistent in color.
The tiles are double filled, first, by machinery and then by hand if any holes remain.
None of the travertine tiles of this grade will have large holes that were filled.
The edges of the tiles are smooth and evenly sized with uniform beveled edges.
Standard or Second Grade
This grade offers the second largest selection of travertine tile colors free from gray or black discoloration.
The travertine tiles are carefully chosen to have a consistent color throughout the lot.
Tiles are double filled as in the premium grade.
Some large holes are allowed in standard grade travertine tiles. Additionally, some holes may be filled through the full thickness of the tile.
The color may contain some striations or swirls.
The edges of the tiles are smooth and evenly sized with uniform beveled edges.
Commercial or Third Grade
Large color variations are allowed within the tile including gray or black markings.
Small unfilled holes are allowed as are small defects in sizing and honing.
The tiles are not hand filled.
It is acceptable for large voids to be filled.
Small holes that run from the surface to the bottom of the tile are allowed.
Edges may be cracked or broken.
Tiles may be delivered without color selection or sorting.
Travertine Types
Cut Types
Due to the bedding planes inherent in most travertine, it is possible to achieve a dramatically different look depending on the cut type chosen. The two cut types used to create travertine tiles are the Vein Cut and the Fleuri Cut. The travertine itself is the same for both types of tile; it is only the type of cut that causes the stone to differ in appearance.
Vein Cut
Vein cut describes the cutting process by which a cut is made against the bedding planes, or along the vein. This exposes the edge of the formation and gives the travertine tile a linear pattern.
Fleuri Cut
Fleuri cut, which is also known as a cross cut, is a cut made parallel to the bedding plane. This exposes a random pattern that is often circular. This cut does result in a strong tile; however, it is not ideal for high-traffic areas due to holes that may appear with heavy use. After installation, if holes should appear, it is standard practice to fill those holes instead of replacing the tile.
What criteria indicates good quality travertine tile?
All four corners of the tile should be cut at 90 degrees.
The color of the stone should not be marred my rust colored markings on either side.
There should be no pores in the filling of the stone.
The filling should consist of a hard resin that will not chip; cement is unacceptable.
The side cuts should be perfectly perpendicular; a slope is unacceptable.
The color of the tile should be consistent throughout the lot with limited color variations.
The thickness of the tile should be measured in inches and should be 18” x 18”.
The shipping crates should be strong wooden pallets suitable for forklifts.
The face of the tile should be visible from both sides of the shipping crates.
Styrofoam should be used on the bottom and sides of the tiles for protection.
Subscribe to:
Comments (Atom)